Boost Express includes a Landing Page Editor that helps you create a one-page website for your campaign. This is the page people will see after clicking your ad. It’s built from ready-made sections and doesn’t require any coding.
Choose a starting point
To create a landing page, go to the event workspace or start from the campaign setup flow. You’ll be asked to choose a starting point:
| Option | Use case |
|---|---|
| Blank website | You want full control and prefer to add sections one‑by‑one. |
| Universal template | You want a ready-made page you can quickly edit — change the text, images, or sections. |
| AI‑generated template (coming soon) | You want an AI-powered setup that builds the page for you. |
Canvas
Adding a section
To add a new section, click + Add section on the canvas. This button appears at the top of an empty page or between existing blocks when using a template.
Clicking it opens a popup with a library of ready-made blocks grouped by purpose:
- Hero – attention-grabbing headers with images or buttons.
- About, Services, Team – sections for company information, offerings, and team profiles.
- Call to action – sections with a strong button or offer.
- Form – contact or signup forms.
- Text, Images & Gallery, Video – sections for adding basic content and media.
- Demo – lets visitors book a meeting or request a demo. Learn more about using the Book a meeting section.
- Custom – allows adding your own HTML block or a full-width image.
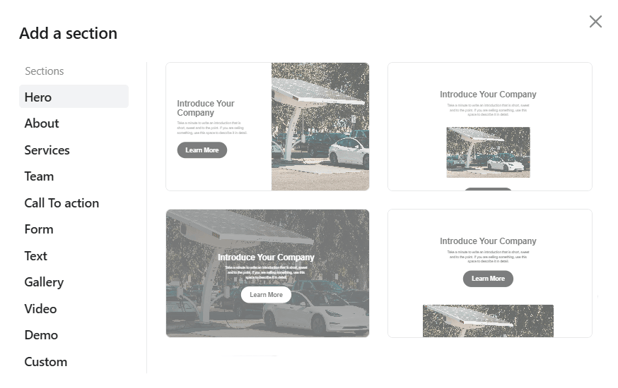
Choose any layout by clicking its thumbnail — the section will be added to your page. You can reorder them later.
You can change the layout of a section using the Change section button that appears on hover. This lets you quickly switch between layout options from the same section group, for example different Hero styles.
⚠️ Note: Switching layouts will reset any unsaved edits in that section.
Editing text
To edit any text on the page, just click on it. A small formatting toolbar will appear above the selected block. It includes basic text options:
- Bold, italics, underline, and strikethrough
- Text alignment
- Text color and background color
- Links
- Clear formatting

Section toolbar
When you hover over a section, a toolbar appears in the top-right corner. It gives you quick access to common actions:
- Duplicate – make a full copy of the section
- Hide – temporarily remove the section from view without deleting it
- Settings – open the section settings panel
- Delete – remove the section permanently
- Copy / Paste – duplicate content between sections
- Move up ▲ / down ▼ – change the order of sections on the page

Section settings panel
|
Click the gear icon in the section toolbar to open the Section settings panel. The available options depend on the section type, but generally fall into two categories:
These settings let you control the overall look and feel of the section beyond what’s editable inline. For HTML sections, the panel provides a code editor where you can add or update custom markup. The content you enter is rendered directly inside the section, which allows you to embed widgets, attach tracking scripts, or extend the page layout with your own elements. |
 |
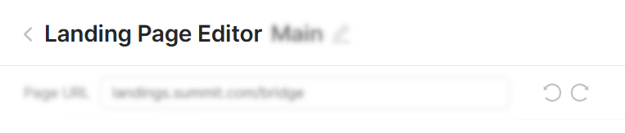
URL
At the top of the editor, you’ll see a field for setting the Page URL — this defines the public link where your landing page will appear. You can only edit the part after the last /, which keeps all URLs within the event’s domain.
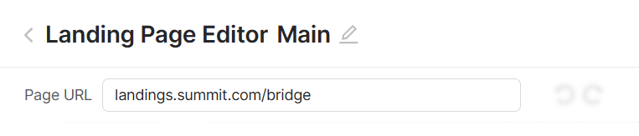
Undo and redo
Next to the URL field, you’ll find Undo and Redo buttons. These let you move step-by-step through your recent changes while editing, making it easy to fix mistakes or restore previous content.
Saving and publishing your page
When you’re done editing, click Save to store your work as a Draft. This also unlocks two more actions:
- Preview – see how your page will look before it goes live
- Publish – send the page to the event organizer for review
After you click Publish, the status changes to On Moderation, and the organizer is notified. Once the organizer approves your page, the status becomes Published, and your landing page goes live at the specified URL.

If the page is Rejected, you’ll see a reason provided by the organizer. You can make the necessary changes and submit an Appeal using the button in the top bar.

Editing an existing page
To update a landing page you've already created, go to the event workspace and open the Landing pages tab. Click on the page you want to edit and it will open in the editor.
FAQ
›︎ Can I use one landing page for multiple campaigns?Yes, you can link the same page to several campaigns within the same event.
›︎ Can a campaign have more than one landing page?No, each campaign can link to only one landing page. However, you can reuse the same landing page across multiple campaigns within the same event.
›︎ Is the page visible right after I click Publish?No, it first goes to the event organizer for review. Once they approve it, the page becomes public.
›︎ Will my changes be saved automatically?No, changes are saved manually. Always click Save to store your work and unlock the Preview and Publish options.